
This comprehensive guide details the proper techniques for installing beautiful and durable cedar shingles‚ ensuring a weather-tight and long-lasting roof.
It covers everything from material selection and roof preparation to nailing specifics and crucial code compliance‚ offering insights for both DIYers and professionals.
Cedar shingles offer a timeless aesthetic and exceptional durability‚ making them a popular choice for roofing and siding. However‚ proper installation is paramount to realizing these benefits and avoiding costly issues down the line.
This guide provides a detailed walkthrough of the cedar shingle installation process‚ emphasizing best practices and adherence to local building codes. Understanding the nuances of cedar‚ from grading to fastening‚ is crucial for a successful project. We’ll cover everything from preparing the roof deck to achieving the correct exposure and overlap‚ ensuring a weather-resistant and visually appealing result. Proper installation safeguards against leaks‚ rot‚ and premature failure‚ maximizing the lifespan of your cedar shingles.

Tools and Materials Required
Successful cedar shingle installation demands specific tools and high-quality materials. Essential tools include a tape measure‚ chalk line‚ hammer (or siding nailer)‚ utility knife‚ and safety glasses. A roofing square and level are vital for accurate layout.
Materials needed encompass cedar shingles (graded appropriately)‚ underlayment (felt or cedar breather)‚ corrosion-resistant fasteners (nails)‚ and flashing for chimneys and vents; Ensure fasteners meet local code requirements for length. Consider a siding nailer for efficiency‚ though hand-driving remains a viable option. Don’t forget a ladder and appropriate safety gear!
Understanding Cedar Shingle Grades
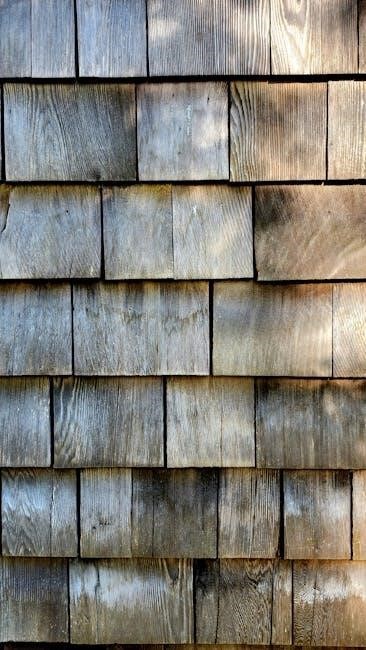
Cedar shingles are categorized by grade‚ impacting their appearance and suitability for different projects. Number 1 grade shingles represent the highest quality‚ exhibiting fewer imperfections and consistent dimensions‚ ideal for premium aesthetics. These typically allow for a keyway space of 1/8 to 1/4 inch.
Number 2 grade shingles offer a more rustic look with greater variation‚ making them a cost-effective choice where perfection isn’t paramount. Yellow Cedar Number 1 grade requires a 1/4 to 3/8 inch keyway. Understanding these distinctions is crucial for selecting shingles that align with your budget and desired outcome.
Number 1 Grade Shingles
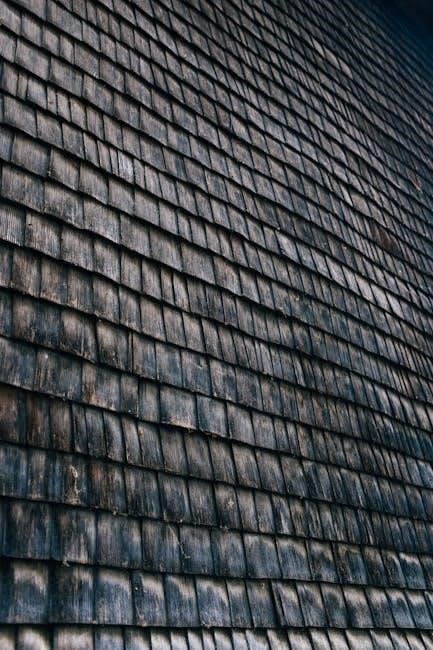
Number 1 grade cedar shingles represent the pinnacle of quality‚ showcasing minimal defects and consistent dimensions. These premium shingles are meticulously crafted‚ offering a refined aesthetic for discerning homeowners. They are ideal for projects where a flawless appearance is paramount‚ providing a sophisticated and enduring roof covering.
Installation of Number 1 grade shingles requires precision‚ maintaining a keyway space of 1/8 to 1/4 inch between each shingle for optimal performance and visual appeal. Selecting this grade ensures a long-lasting‚ beautiful roof that enhances your property’s value.
Number 2 Grade Shingles
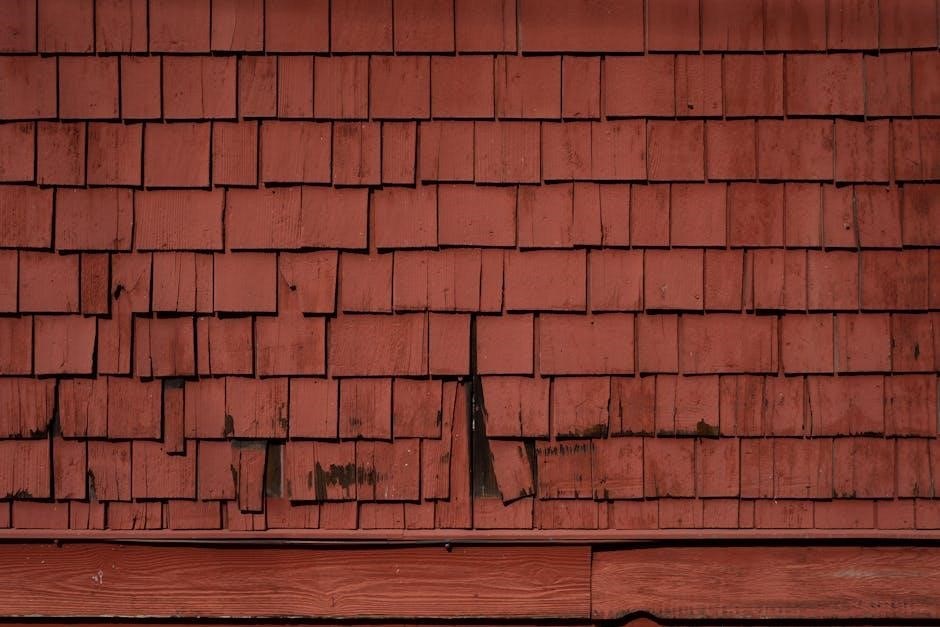
Number 2 grade cedar shingles offer a cost-effective alternative without significantly compromising quality. While exhibiting more natural characteristics and occasional minor imperfections‚ these shingles still provide excellent weather protection and a rustic charm. They are a practical choice for homeowners seeking affordability and a natural aesthetic.
When installing Number 2 grade shingles‚ maintaining a slightly wider keyway space – 1/4 to 3/8 inch – accommodates potential variations in shingle width. This ensures proper alignment and prevents binding‚ resulting in a durable and visually pleasing roof covering that stands the test of time.
Preparing the Roof Deck
Proper roof deck preparation is paramount for a successful and long-lasting cedar shingle installation. Begin with a thorough inspection of the roof sheathing‚ ensuring it’s structurally sound‚ dry‚ and free of rot or damage. Replace any compromised sections before proceeding. A solid‚ stable deck provides the necessary foundation for the shingles.
Next‚ install underlayment – typically felt paper or a breathable membrane like Cedar Breather – over the entire deck. This crucial layer acts as a secondary water barrier‚ protecting the sheathing from moisture intrusion and extending the roof’s lifespan. Overlap seams appropriately for complete coverage;
Inspecting the Roof Sheathing
A meticulous inspection of the roof sheathing is the first critical step in preparing for cedar shingle installation. Carefully examine each sheet for signs of rot‚ water damage‚ or structural weakness. Pay close attention to areas around vents‚ chimneys‚ and valleys‚ as these are prone to moisture accumulation.
Probe the wood with a screwdriver to identify soft spots‚ and replace any compromised sections immediately. Ensure the sheathing is securely fastened and provides a solid‚ level surface for the underlayment and shingles. Addressing sheathing issues now prevents future problems.
Installing Underlayment (Felt and Cedar Breather)
Proper underlayment installation is crucial for protecting the roof deck from moisture and extending the life of your cedar shingles. Begin by applying a layer of felt paper‚ overlapping seams by at least six inches‚ and securing it with staples or nails.
For enhanced protection‚ consider installing a breathable membrane like Cedar Breather over the felt. This allows moisture vapor to escape while preventing water intrusion. Ensure proper overlap and secure fastening‚ following the manufacturer’s instructions for optimal performance and longevity.
Calculating Material Quantities
Accurate material estimation is vital to avoid costly delays and ensure a smooth installation process. Cedar shake siding should be installed with triple coverage‚ meaning three layers of shingles effectively cover the wall area.
To achieve this‚ determine the desired exposure – the visible portion of each shingle – which should be roughly one-third of the shingle’s total length. Calculate the total roof area and factor in waste (typically 10-15%) to arrive at the final shingle quantity needed.
Triple Coverage Method
The triple coverage method is a standard practice when installing cedar shake siding‚ maximizing weather protection and creating a visually appealing‚ layered effect. This technique ensures three layers of shingles overlap‚ providing superior resistance to rain‚ snow‚ and wind penetration.
To implement this‚ the shingle exposure – the visible portion of each piece – must be carefully calculated. It should be approximately one-third of the shingle’s overall length‚ allowing for sufficient overlap and creating the desired triple-layered coverage.

Determining Shingle Exposure
Accurately determining shingle exposure is crucial for achieving proper triple coverage and a visually consistent roof. Exposure refers to the amount of each shingle visible after installation‚ influencing both aesthetics and weather resistance.
To calculate the correct exposure‚ divide the total length of the cedar shingle by three. This ensures each successive course overlaps sufficiently‚ creating the necessary three layers of protection. Adjustments may be needed based on the specific shingle profile and desired aesthetic‚ but maintaining approximately one-third exposure is a reliable starting point.
Establishing the Installation Line
A perfectly straight and level installation line is fundamental to a professional-looking cedar shingle roof. Begin by identifying the highest point along the eaves of the roof. From this point‚ measure upwards six inches‚ ensuring adequate clearance from the ground to prevent moisture damage and comply with common building practices.
Mark this six-inch height and then use a level and chalk line to extend a consistent line around the entire perimeter of the roof. This line will serve as the guide for the first course of shingles‚ guaranteeing a uniform and visually appealing installation.
Installing the Starter Course
The starter course is the foundation of your cedar shingle roof‚ demanding precision for long-term performance. Begin by carefully aligning the first row of shingles along the established installation line‚ ensuring a consistent overhang. Maintain the crucial 6-inch clearance from the ground to protect against moisture and potential damage.
Utilize a level chalk line to guarantee a perfectly straight and even starter course around the entire roof perimeter. This initial row establishes the alignment for all subsequent courses‚ so accuracy is paramount for a visually appealing and structurally sound roof.
Maintaining 6″ Clearance from the Ground
Establishing a 6-inch clearance between the bottom row of cedar shingles and the ground is a critical step‚ safeguarding against moisture-related issues and potential physical damage. This gap prevents ground-level splashing from directly contacting the wood‚ reducing the risk of rot and extending the roof’s lifespan.
To achieve this‚ identify the highest point on the ground surrounding the structure‚ then measure upwards six inches. Mark this point and use a level chalk line to create a consistent perimeter guide for the starter course installation‚ ensuring uniform clearance across the entire roofline.
Using a Level Chalk Line
A level chalk line is indispensable for ensuring a straight and consistent starter course‚ the foundation for a professionally installed cedar shingle roof. After establishing the 6-inch ground clearance and marking the perimeter‚ carefully stretch a chalk line around the entire roofline.
Ensure the line is taut and perfectly level‚ then “snap” it to create a clear‚ visible guide for shingle placement. This precise line guarantees uniform exposure and prevents a wavy or uneven appearance‚ contributing to both the aesthetic appeal and functional integrity of the finished roof.
Fastener Selection and Guidelines
Choosing the correct fasteners is critical for a secure and long-lasting cedar shingle installation. Fastener length requirements vary significantly based on local building codes and cedarwood thickness‚ so always verify local regulations before beginning.
While hand driving was traditionally favored‚ modern siding nailers offer increased efficiency for most installers. Because cedar shingles and shakes often require longer nails than asphalt shingles‚ utilizing a siding nailer is frequently necessary to accommodate these lengths and ensure proper penetration.
Fastener Length Requirements (Local Codes)
Determining appropriate fastener length is paramount‚ and it’s heavily dictated by local building codes and regional requirements. These regulations aren’t uniform; municipalities and regions often have differing stipulations regarding penetration depth and shingle thickness.
Always consult your local building department to obtain the precise fastener length specifications for cedar shingle installations in your area. Ignoring these codes can lead to failed inspections and compromised roof integrity‚ potentially voiding warranties and creating safety hazards. Prioritize compliance above all else.
Hand Driving vs. Nail Guns (Siding Nailers)
Historically‚ hand driving nails was the industry standard for cedar shingle installation‚ allowing experienced roofers to achieve remarkable speed and precision. However‚ modern installers increasingly favor nail guns‚ specifically siding nailers‚ due to efficiency gains.
Because cedar shingles and shakes typically require longer nails than asphalt shingles‚ siding nailers are often the preferred choice. While hand driving offers control‚ nail guns significantly accelerate the process‚ making larger projects more manageable. Both methods are viable‚ but consider project scale and installer expertise.
Keyway Spacing
Maintaining proper keyway spacing is crucial for allowing natural wood movement and preventing buckling or distortion of the cedar shingles. For Number 1 Grade Cedar Shingles Direct Alaskan Yellow Cedar‚ a keyway space of 1/8 to 1/4 inch between each shingle is recommended.

When utilizing Number 1 Grade Cedar Shingles Direct Yellow Cedar shingles‚ a slightly wider keyway space of 1/4 to 3/8 inch should be maintained. These guidelines accommodate the wood’s expansion and contraction with changes in humidity‚ ensuring the roof’s longevity and structural integrity.
Number 1 Grade – 1/8″ to 1/4″ Keyway Space
For installations utilizing Number 1 Grade Cedar Shingles Direct Alaskan Yellow Cedar‚ precise keyway spacing is paramount for optimal performance. Maintaining a consistent gap of 1/8 inch to 1/4 inch between adjacent shingles allows for natural expansion and contraction due to moisture and temperature fluctuations.
This spacing prevents buckling and ensures the shingles lie flat‚ contributing to a watertight and aesthetically pleasing roof. Adhering to this specification is vital for preserving the integrity and longevity of the cedar shingle roof‚ maximizing its weather resistance.
Number 1 Grade Yellow Cedar – 1/4″ to 3/8″ Keyway Space
When installing Number 1 Grade Cedar Shingles Direct Yellow Cedar shingles‚ a slightly wider keyway space is recommended for optimal results. Maintain a consistent gap ranging from 1/4 inch to 3/8 inch between each shingle during installation.
This increased spacing accommodates the natural movement of Yellow Cedar‚ preventing potential issues like buckling or distortion as the wood expands and contracts with changes in humidity and temperature. Proper keyway spacing is crucial for a durable‚ weather-resistant‚ and visually appealing cedar roof.
Proper Nailing Techniques
Achieving a secure and lasting cedar shingle installation hinges on employing correct nailing techniques. While hand driving was once standard‚ many installers now utilize siding nailers due to increased efficiency. Regardless of the method‚ ensure nails penetrate adequately into the roof deck‚ following local building codes for appropriate length.
Consistent nail placement is vital; avoid overdriving or angling nails‚ which can compromise the shingle’s integrity. Experienced installers can achieve remarkable speed with either method‚ prioritizing quality and adherence to best practices for a durable roof.
Overlap and Exposure Considerations
Proper overlap and exposure are critical for weather protection and aesthetic appeal when installing cedar shingles. The “triple coverage” method is recommended‚ meaning three layers of shingles cover the wall‚ providing robust defense against the elements. To achieve this‚ the visible portion – the exposure – should be less than one-third of the shingle’s total length.
Carefully calculating exposure ensures adequate overlap‚ preventing water intrusion and maximizing the shingle’s lifespan. Consistent exposure throughout the installation creates a uniform and visually pleasing finished roof‚ enhancing the home’s curb appeal and long-term value.
Dealing with Roof Angles and Valleys
Navigating roof angles and valleys requires precise cutting and flashing techniques for a watertight installation. Complex roof geometries demand careful planning and accurate measurements to ensure shingles align correctly and effectively shed water. Valleys‚ where two roof planes meet‚ are particularly vulnerable to leaks and necessitate robust flashing.
Properly installed valley flashing directs water away from the vulnerable intersection‚ preventing damage to the underlayment and roof deck. Adjusting shingle exposure and utilizing specialized cutting methods are essential when working with angled roofs‚ maintaining consistent coverage and a professional finish.
Ridge Cap Installation
The ridge cap is the final layer‚ protecting the peak of the roof and providing a finished look. It requires careful attention to detail to ensure a secure and weather-resistant seal. Ridge caps are typically installed over a ridge vent‚ allowing for proper attic ventilation and preventing moisture buildup.
Overlapping ridge caps correctly is crucial‚ with each successive course covering the fasteners of the previous one. Using longer fasteners specifically designed for ridge cap installation guarantees a strong hold‚ resisting wind uplift and preventing shingle displacement. Proper alignment and consistent exposure create a visually appealing and durable ridge line.
Flashing Around Chimneys and Vents
Proper flashing is paramount when integrating roof penetrations like chimneys and vents with cedar shingles‚ preventing water intrusion and potential damage. Flashing materials should be compatible with cedar‚ typically using galvanized steel‚ copper‚ or aluminum. Step flashing‚ installed alongside the chimney or vent‚ interlocks with the shingles‚ creating a watertight barrier.
Counter flashing‚ applied over the step flashing‚ further seals the area. Around vents‚ use pre-fabricated vent flashing or custom-fit flashing to ensure a snug fit. Caulking around flashing is essential‚ but use a high-quality‚ paintable sealant designed for exterior use‚ maintaining long-term protection.
Common Installation Errors to Avoid
Several common mistakes can compromise a cedar shingle roof’s integrity. Incorrect nail placement‚ such as driving nails too high or low‚ can lead to shingle distortion or water penetration. Insufficient keyway spacing restricts natural wood movement‚ causing buckling. Improper overlap exposes the underlayment‚ reducing weather resistance.
Ignoring local building codes regarding fastener length or shingle exposure can result in failed inspections. Failing to pre-drill holes‚ especially near shingle edges‚ can cause splitting. Skipping underlayment installation leaves the roof deck vulnerable to moisture. Careful attention to detail prevents these costly errors.
Cedar Shingle Maintenance
Regular maintenance extends the life of your cedar shingle roof. Annual inspections identify loose or damaged shingles requiring replacement. Remove moss and algae gently with a soft brush and cedar-safe cleaning solution to prevent moisture retention. Clear gutters and downspouts to ensure proper water drainage‚ avoiding wood rot.
Consider applying a preservative treatment every few years to protect against UV damage and decay‚ maintaining the shingles’ natural beauty. Promptly address any leaks to prevent further damage. Proactive care safeguards your investment and ensures decades of reliable performance.
Local Building Codes and Regulations

Cedar shingle installations are subject to stringent local building codes. Always verify fastener length requirements with your municipality‚ as they vary regionally. Adherence to fire safety regulations is crucial‚ potentially requiring fire-retardant treatments. Wind resistance standards dictate proper nailing patterns and shingle overlap.
Permitting processes often require detailed plans and inspections. Compliance ensures structural integrity and homeowner safety. Ignoring regulations can lead to fines and costly rework. Consult with local building officials before commencing any installation to guarantee a code-compliant and approved roof.