
The GE Self-Cleaning Oven offers a convenient and efficient way to maintain your appliance. With advanced technology, it eliminates food residue through high-temperature cycles, ensuring a spotless interior without harsh chemicals. Designed for ease of use and energy efficiency, this feature enhances cooking experiences while reducing maintenance efforts. Perfect for modern kitchens, it combines innovation with reliability to deliver optimal results.
1.1 Overview of Self-Cleaning Technology
GE’s self-cleaning ovens utilize high-temperature heating to burn off food residue, leaving a light ash that’s easy to wipe away. This process eliminates the need for harsh chemicals, making maintenance simpler. The oven’s interior is designed with a porcelain enamel finish that withstands extreme heat, while fiberglass insulation traps heat during the cycle. A typical cleaning cycle lasts 3–5 hours, depending on soil level. Proper ventilation is essential to vent gases produced during cleaning. This innovative system ensures a clean oven with minimal effort, combining efficiency and convenience for modern kitchens.
1.2 Benefits of Using a Self-Cleaning Oven
A self-cleaning oven offers numerous advantages for homeowners. It eliminates the need for harsh chemical cleaners, reducing exposure to toxic fumes and ensuring a safer cleaning process. The high-temperature cycle effectively removes tough food residue, leaving behind a light ash that’s easy to wipe away. This feature saves time and effort, as manual scrubbing is minimized. Additionally, self-cleaning ovens are energy-efficient and designed to maintain optimal performance over time. They also help reduce kitchen odors and keep the oven looking like new, making them a practical choice for busy households seeking convenience and hygiene.
Safety Precautions
Always turn off surface burners before starting a self-cleaning cycle. Remove flammable materials and ensure proper ventilation to prevent carbon monoxide exposure. Keep children away during cleaning.
2.1 Important Safety Information
Before using the self-cleaning feature, ensure all surface burners are turned off and the oven is clear of cookware, including shiny metal racks. Avoid storing flammable materials nearby. Proper ventilation is crucial to minimize carbon monoxide exposure, so keep windows open or use a ventilation fan. Children should be kept away during the cleaning cycle due to high temperatures. Never use abrasive cleaners or scrubbers, as they can damage the oven’s finish. In case of malfunction, disconnect power immediately and contact a qualified technician for servicing.
2.2 Preparing the Oven for Safe Cleaning
To ensure a safe and effective cleaning process, remove all racks, pans, and cookware from the oven. Wipe up excess food spills to prevent smoke and fumes during the cycle. Check for any damaged or worn-out oven components and address them before starting. Ensure the oven is completely empty, as only gray porcelain-coated racks should remain. Keep the cooktop burners off and avoid using the self-clean feature for other stove parts. Properly latch the oven door and ensure it is securely closed. Always follow the manufacturer’s guidelines to avoid accidents or damage.
2.3 Ventilation During Self-Cleaning Cycle
Proper ventilation is crucial during the self-cleaning cycle to remove fumes and odors. Open windows or use an exhaust fan to minimize exposure to carbon monoxide released by the oven’s insulation. Ensure the kitchen is well-ventilated to prevent the buildup of harmful gases. Avoid leaving the area unattended and keep the room ventilated for at least 30 minutes after the cycle ends. This step ensures a safer and more efficient cleaning process while maintaining a comfortable environment in your home.
Operating the Self-Cleaning Oven
Activate the self-cleaning cycle by pressing the Self Clean button, selecting the duration, and starting the process. The oven automatically shuts off after completion.
3.1 Steps to Initiate a Self-Cleaning Cycle
To initiate a self-cleaning cycle, start by removing all racks, pans, and utensils from the oven. Wipe up excess spills to prevent smoke. Close and latch the oven door securely. Press the Self Clean button on the control panel, then select the desired cleaning duration using the + and ⎼ buttons. Choose between 3 to 5 hours, depending on soil level. Press Start to begin the cycle. Ensure proper ventilation during the process to minimize odors and fumes. Avoid using abrasive cleaners post-cycle, as the oven surfaces are self-cleaning. Allow the oven to cool before wiping away ash residue with a damp cloth.
3.2 Selecting the Cleaning Duration
When selecting the cleaning duration for your GE Self-Cleaning Oven, consider the level of soil inside. Light soil requires 3 hours, medium soil 4 hours, and heavy soil 5 hours. Use the + and ⎼ buttons on the control panel to adjust the time. Default settings are available, but customization ensures optimal results. Ensure the oven is empty and racks are removed before starting; Proper ventilation is essential to minimize odors during the cycle. Allow the oven to cool completely before wiping away ash residue. Always refer to your manual for specific guidance on selecting the right duration for your cleaning needs.
3.3 Post-Cycle Procedures
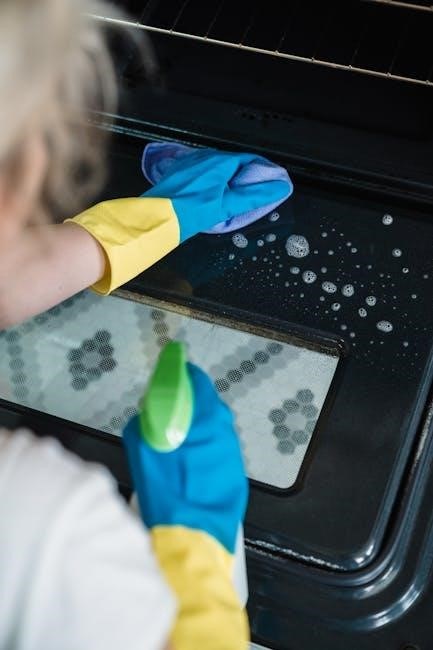
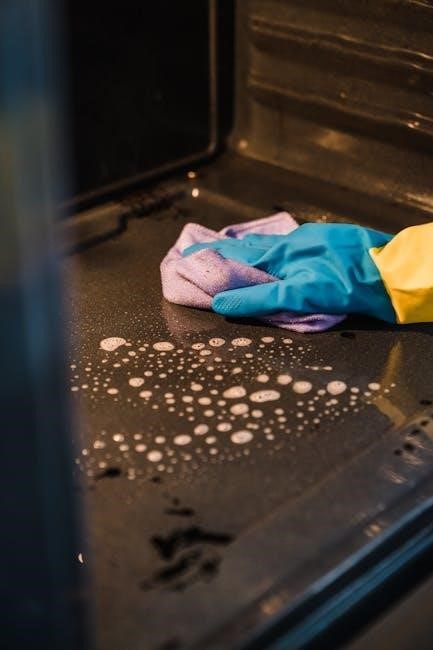
After the self-cleaning cycle completes, allow the oven to cool completely before opening the door. Once cooled, remove any ash residue using a damp cloth or paper towels. Avoid using abrasive cleaners, as they may damage the finish. Wipe down the window and exterior with a mild detergent for a polished look. If stubborn stains remain, repeat the cleaning cycle or use a non-abrasive cleaner specifically designed for self-cleaning ovens. Ensure all surfaces are clean and dry before returning racks or cookware. Regular post-cycle maintenance ensures optimal performance and longevity of your GE Self-Cleaning Oven.
Cleaning and Maintenance
Regularly clean the oven exterior with mild soap and water. For tough stains, use a non-abrasive cleaner. Avoid harsh chemicals to preserve the finish and functionality.
4.1 Manual Cleaning of Oven Surfaces
For manual cleaning, remove racks and shelves, then wash them in soapy water. Wipe interior surfaces with a mild detergent solution, avoiding abrasive cleaners that can damage finishes. For stubborn stains, apply a non-abrasive oven cleaner, following product instructions. After cleaning, rinse thoroughly and dry to prevent water spots. Avoid using harsh chemicals or scrubbers, as they may harm the oven’s surfaces. Regular manual cleaning helps maintain the oven’s appearance and performance between self-cleaning cycles.
4.2 Cleaning the Exterior and Glass Cooktop
For the exterior, use a soft cloth and mild soap solution to wipe down surfaces, avoiding abrasive cleaners that can scratch the finish. The glass cooktop can be cleaned with a gentle glass cleaner and a lint-free cloth, removing any food residue or spills. Avoid using harsh chemicals or scrubbers, as they may damage the glass. For tougher stains, apply a small amount of cooktop cleaner and rub gently. Regular cleaning helps maintain the appearance and functionality of the exterior and cooktop, ensuring a sleek and hygienic cooking environment.
4.3 Tips for Removing Stubborn Stains
For tough stains, apply a non-abrasive oven cleaner or a paste made from baking soda and water. Let it sit overnight, then wipe clean with a damp cloth. Avoid using bleach or harsh chemicals, as they can damage surfaces. For glass cooktops, mix equal parts white vinegar and water, apply with a microfiber cloth, and buff to remove streaks. Scrubbers like steel wool should be avoided to prevent scratching. Regular cleaning prevents stains from building up, keeping your oven and cooktop in pristine condition.

Troubleshooting Common Issues
If the self-cleaning mode malfunctions, ensure the oven is empty and properly latched. Check error codes in the manual for specific solutions, and reset the oven if necessary.
5.1 Malfunctioning Self-Cleaning Mode
If the self-cleaning mode isn’t functioning, ensure the oven is empty and the door is securely latched. Check for error codes on the display, as they indicate specific issues. Refer to the manual for code meanings and solutions. If the oven doesn’t start, verify that the power supply is stable. Avoid using the oven until the problem is resolved. For persistent issues, disconnect power and consult a qualified technician to prevent further complications or safety hazards.
5.2 Error Codes and Solutions
Common error codes like “LOC” or “F” indicate issues with the self-cleaning mode. “LOC” suggests the control lock is activated; press the Control Lock button to unlock. If an “F” error appears, the oven may overheat; ensure proper ventilation and restart the cycle. Refer to the manual for specific code meanings. For persistent issues, disconnect power for 30 minutes and reset. If problems continue, contact GE customer support or a certified technician for assistance. Always follow safety guidelines to avoid further complications.
5.3 Resetting the Oven After a Cycle
To reset the oven after a self-cleaning cycle, allow it to cool completely. Once cooled, remove any ash residue with a damp cloth. If an error persists, switch off power at the circuit breaker for 30 minutes. This resets internal controls. After restoring power, test the oven by setting a low temperature. If issues remain, refer to the troubleshooting guide or contact GE support. Regular resets help maintain optimal performance and ensure safety features function correctly.
Additional Features and Settings
The GE Self-Cleaning Oven includes a control lock function, timer, and energy-efficient settings. These features enhance usability, safety, and performance, making cooking and maintenance more convenient and efficient.
6.1 Control Lock Function
The Control Lock function on your GE Self-Cleaning Oven ensures accidental changes to settings are prevented. By pressing and holding the Control Lock button, a lock symbol appears, disabling the control panel. This feature is especially useful with children around, preventing unintended adjustments during cooking. To deactivate, simply press and hold the button again until the lock symbol disappears. This enhances safety and maintains consistent cooking conditions, providing peace of mind while using your oven. The lock function works seamlessly with other settings, ensuring a smooth and interruption-free cooking experience.
6.2 Using the Timer and Clock
The timer and clock on your GE Self-Cleaning Oven simplify meal preparation. To set the cooktop timer, press the Settings button, select Cooktop Timer, choose the desired burner, and adjust the duration using the + and — buttons. The timer can also be set while the oven is in use for synchronized cooking. Once set, the timer will count down and alert you with a tone when the cycle completes. For enhanced convenience, the timer volume can be adjusted for better audibility, ensuring you never miss a notification. This feature is designed to streamline your cooking process and ensure perfect results every time.
6.3 Energy Efficiency and Power Management
GE Self-Cleaning Ovens are designed with energy efficiency in mind, offering smart power management to reduce energy consumption. Features like the self-cleaning cycle optimize heat retention, minimizing energy use during cleaning. The oven’s insulation and advanced heating elements ensure even cooking while lowering power draw. Additionally, the cooktop burners provide consistent heat at varying power levels, allowing you to choose the right energy output for your cooking needs. This balance of performance and efficiency helps lower your energy bills and environmental impact, making it a sustainable choice for modern kitchens.

Installation and Setup
Ensure proper installation by using the correct tools and materials. Secure all electrical connections and level the appliance for optimal performance. Follow the manual’s step-by-step guide carefully.
7.1 Required Tools and Materials
To ensure a smooth installation, gather the necessary tools and materials beforehand. You will need a screwdriver, pliers, and an adjustable wrench for connecting electrical components. A level is essential to ensure the oven is properly aligned. Additionally, have wire nuts or connectors for securing electrical connections. For sealing gaps, silicone sealant is recommended. Insulation materials, such as fiberglass, may be required for certain installations. Always refer to the manual for specific requirements to guarantee safety and proper function. Having these tools and materials ready will streamline the installation process and prevent delays.
7.2 Step-by-Step Installation Guide
Begin by preparing the installation area, ensuring it is clear, well-ventilated, and level. Carefully unpack the oven and inspect for any damage. Position the oven in its designated space, ensuring proper alignment with surrounding surfaces. Use adjustable feet to level the unit and secure it to prevent movement. Connect electrical components according to the wiring diagram, ensuring all connections are tight and meet local codes. Install any required insulation and seal gaps with silicone sealant. Double-check all connections and settings before powering on. Test the oven at a low temperature to ensure proper operation. Refer to the manual for any specific adjustments or additional steps.
7.3 Connecting Electrical Components
Connect the oven to a dedicated 240-volt electrical circuit, ensuring compliance with local codes. Use a Perilex connection, which accommodates higher power demands, typically for induction hobs. This connection has five holes instead of two and is designed for heavier loads. Ensure the circuit breaker is rated appropriately, such as 40 amps, and the wire gauge, like 8-gauge, is suitable for the distance and power requirements. Secure all connections tightly and verify polarity to avoid electrical issues. Always turn off the power supply before starting work. Consult a licensed electrician if unsure to ensure safe and proper installation.
Warranty and Support
GE Appliances offers a comprehensive warranty covering parts and labor for defective components. For support, visit the GE website or call 1-800-626-2005 for assistance. Replacement parts are available through authorized dealers, ensuring your oven performs optimally.
8.1 Understanding Your Warranty
The GE warranty for your self-cleaning oven covers parts and labor for manufacturing defects within the specified period. This ensures repairs or replacements are handled by certified technicians. The warranty does not apply to damage caused by misuse, normal wear, or improper installation. Regular maintenance, like cleaning, should be performed as outlined in the manual to maintain warranty validity. For detailed terms, refer to your owner’s manual or contact GE customer service at 1-800-626-2005. Understanding your warranty helps protect your investment and ensures optimal appliance performance over time.
8.2 Contacting Customer Service
For assistance with your GE self-cleaning oven, contact customer service at 1-800-626-2005. Representatives are available to address questions, troubleshooting, and warranty inquiries. Online support is also accessible through the GE Appliances website, where you can find live chat options, email assistance, and downloadable resources. Visit www.geappliances.com for detailed support, including owner’s manuals, FAQs, and repair scheduling. Ensure to have your model number ready for efficient service. This resource helps resolve issues promptly and keeps your oven performing at its best.
8.3 Finding Replacement Parts
To find genuine replacement parts for your GE self-cleaning oven, visit the official GE Appliances website. Use the “Parts & Accessories” section, where you can search by model number (e.g., JB256DMWW) to ensure compatibility. You can also contact GE customer service at 1-800-626-2005 for assistance. Authorized distributors and local appliance repair shops may carry GE parts. Always verify the part number and compatibility before purchasing. This ensures optimal performance and maintains your oven’s warranty. For convenience, digital copies of manuals and part lists are available online through GE’s support portal.
Environmental Considerations
GE self-cleaning ovens are designed with eco-friendly features, including energy-efficient operation. Proper disposal of old appliances is encouraged, and recycling options are available for oven parts.
9.1 Proper Disposal of Old Appliances
Proper disposal of old appliances is crucial for environmental protection. Check local regulations for guidelines on recycling or disposing of large household items. Many communities offer special collection events or facilities for appliances. Ensure hazardous materials, such as doors with glass, are handled safely. Donate working appliances to charities or sell them secondhand. If recycling, remove all detachable parts like racks and shelves. Partner with certified recyclers to ensure eco-friendly disposal. Properly disposing of your old oven helps reduce landfill waste and promotes sustainable practices.
9.2 Recycling Options for Oven Parts
Recycling your old oven parts is an eco-friendly alternative to disposal. Partner with certified appliance recyclers to ensure responsible handling of materials. Remove glass, metals, and other recyclable components separately. Many recycling centers accept large appliances like ovens, breaking them down into reusable materials. Check local programs for drop-off locations or pickup services. Additionally, donate working parts like racks or shelves to repair shops or charities. Always follow environmental guidelines to minimize waste and promote sustainability. Recycling helps conserve resources and reduces landfill contributions, supporting a greener future for your community.
Owning a GE self-cleaning oven simplifies kitchen maintenance. Regular use of the self-clean feature ensures optimal performance. Follow guidelines for proper care and operation to extend its lifespan.
10.1 Final Tips for Optimal Use
For the best experience with your GE self-cleaning oven, always follow safety guidelines and maintenance tips. Regularly wipe down surfaces before major cleaning cycles to prevent heavy buildup. Use the self-clean feature wisely, as excessive use can wear down the oven’s interior. Avoid harsh chemicals and opt for gentle cleaners for manual touch-ups. Check for food residue before starting a cycle to ensure optimal results. Keep the exterior clean to maintain its appearance and functionality. Lastly, refer to the manual for troubleshooting common issues to prevent unnecessary repairs and extend the oven’s lifespan.
10.2 Maintaining Your Oven’s Performance
Regular cleaning is essential to maintain your GE self-cleaning oven’s performance. After each use, wipe down surfaces to prevent food residue buildup. Use the self-clean feature sparingly, as frequent cycles can degrade the interior. Avoid harsh chemicals and abrasive cleaners, which may damage finishes. Instead, opt for mild soap solutions for manual cleaning. Always check racks and shelves for food particles before cycles. Proper ventilation during self-cleaning ensures safety and efficiency. By following these steps, you can preserve the oven’s functionality and extend its lifespan while keeping it in prime condition for years of reliable service.

About GE Appliances
GE Appliances is a trusted brand with a legacy of innovation and quality. For over a century, they’ve delivered reliable home solutions, including cutting-edge ovens, ensuring customer satisfaction and excellence.
11.1 History and Reputation
GE Appliances, established in 1892, has built a legacy of innovation and trust. Known for pioneering home appliances, GE introduced the first electric range in 1927 and continues to lead in kitchen technology. Their self-cleaning ovens exemplify this commitment, offering efficient and reliable solutions. With a reputation for durability and customer-focused designs, GE remains a preferred choice for homeowners, blending tradition with modern advancements to enhance cooking experiences and simplify maintenance.
11.2 Other GE Oven Models
GE offers a diverse range of oven models, each tailored to different cooking needs. Models like the JBP25, JBP45, and JB645DKWW feature advanced self-cleaning technology, energy efficiency, and user-friendly controls. The JBP Series includes electric ranges with multiple burner configurations, catering to both home cooks and professional chefs. These models also incorporate features such as precise temperature control, large oven capacities, and sleek designs to suit various kitchen styles. GE’s commitment to innovation ensures that each model provides reliable performance, making them a trusted choice for modern households.